SUMMARY
This is AI generated summarization, which may have errors. For context, always refer to the full article.

MANILA, Philippines – I plan to celebrate the love month of February by churning out romantic dishes every week.
I’m thinking of a simple and delicious 3-course dinner with a bit of wordplay thrown in – dishes that feature ingredients with the words “passion” or “heart” and even a dish with the word “engagement”!
They’re all still taking shape in my head but I’m very excited to share them with you.
To start our February love fest, I wanted to start with a gift idea. Chocolates and flowers are top of mind when the subject turns to Valentine’s Day gifts so I thought it would be really neat if the two can be combined: an edible chocolate-y bouquet of cake pops!
Cake pops are so hot right now and why not? They’re delicious and absolutely adorable. I made them for the first time to write this column and I was delighted to find that they are also really fun to make!
It might be a lot to take on in one day but the good news is that you can prepare the cake first and decorate the next day. Let’s begin!
This recipe makes 24 cake pops. You’ll need:
- One 15 oz. box devil’s food cake (Yes, we’re using box cake!)
- About 2 cups white chocolate
- About 1½ cups dark chocolate
- Sprinkling ingredients of your choice as needed
- Lollipop sticks (Available in baking supplies shops)
- Styrofoam block (Available in bookstores)
For the chocolate frosting:
- 1/3 cup unsweetened cocoa powder
- 1 cup sugar
- ½ cup butter
- ¼ cup milk
- 1 teaspoon vanilla extract
Procedure:
1. Prepare the box cake according to package instructions. While the cake is baking, get started on the chocolate frosting by putting all the ingredients in a saucepan on medium-high heat. Let it boil for one minute and then set aside to cool.
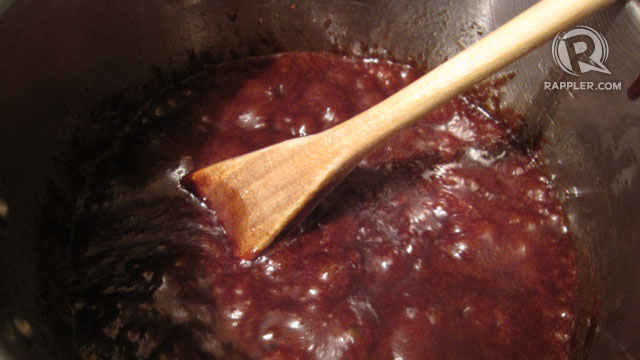
2. When the cake is done, set it aside until it is cool enough to handle. When it’s ready, crumble the cake finely with your hands into a big mixing bowl. The chocolate frosting should be ready to use by now, too. Add it into the mixing bowl and stir into the crumbled cake. The idea is to turn the cake crumbs into a uniformly moist mixture that is wet enough to hold a ball shape. I used about ¾ of my chocolate frosting but please test the mixture and feel this out for yourself.
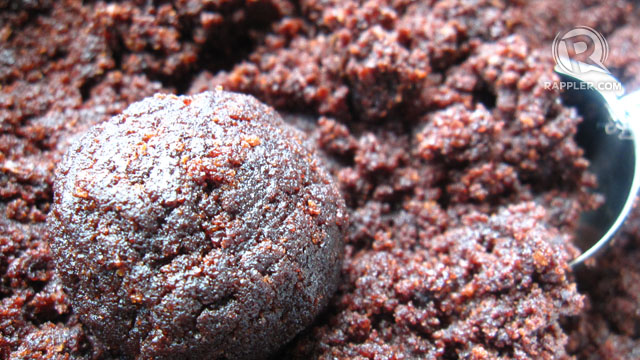
3. For the purpose of uniformity, I used a mini ice cream scooper to portion my cake. Mold them into balls and place on a large plate. Melt a small amount of chocolate in the microwave. Take a lollipop stick and dip into the melted chocolate. The dipped side of the lollipop stick goes into the cake ball, about three-fourths of the way in, to act as an adhesive.
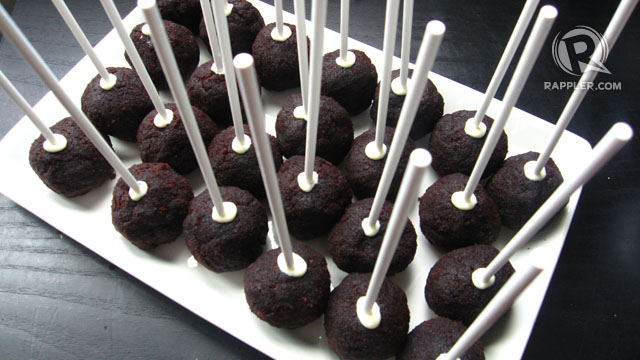
4. When done, put the cake balls in the freezer for about 20 minutes. You can use this time to melt more chocolate and prepare your sprinkling ingredients. For the chocolate, I used white and 70% dark. To sprinkle, I had a station with candy sprinkles, mini marshmallows, chocolate-covered sunflower seeds, crushed ChocNut, potato chips, and crushed pili nuts that I tossed in some chili powder.
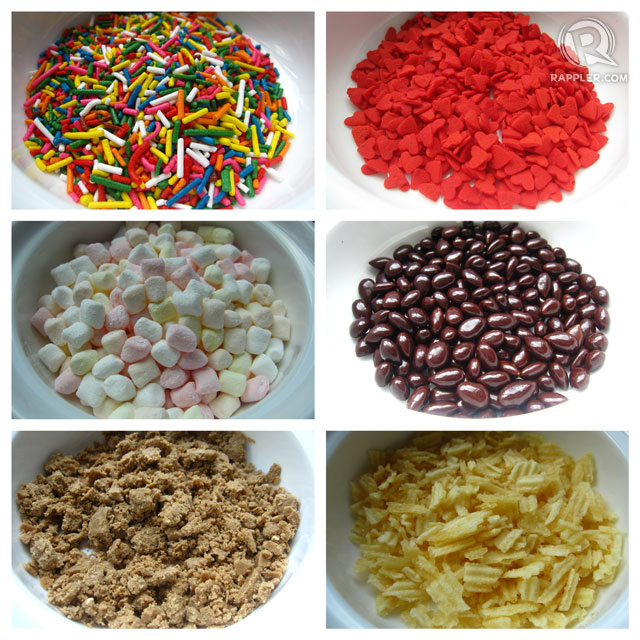
I know, right?! But they all work!
Some notes on melting chocolate:
- I put my chocolate in a mug and melted it in the microwave
- If you’re the double-boiler type then by all means do that but you might end up transferring it because it’s more convenient to have your melted chocolate in a deep container like a mug to dip the cake balls
- If you’re microwaving, melt in small bursts of medium heat and stir between bursts
- Usually, it won’t look like it’s quite there yet but stirring it will help the chocolate melt the rest of the way. The heat of the mug also helps.
- You have to be especially careful with white chocolate – if it gets heated too much, it will actually seize and harden
5. We’re so close to getting creative! But before that, make sure you have your Styrofoam block as part of your decorating station, too. It’s very handy when it’s time for the cake pops to set. I couldn’t find a block so I got a Styrofoam ball and hacked into the thing like it were a melon. Just make sure not to do this near food – there will be little bits of airy Styrofoam. You can also just opt to set the cake pops on a plate but their tops will be flat.
6. Here. We. Go. Get the cake pops out of the freezer. Decide on a sprinkling ingredient or two. Dip the cake ball into the melted chocolate and wait for the excess to drip. Sprinkle.
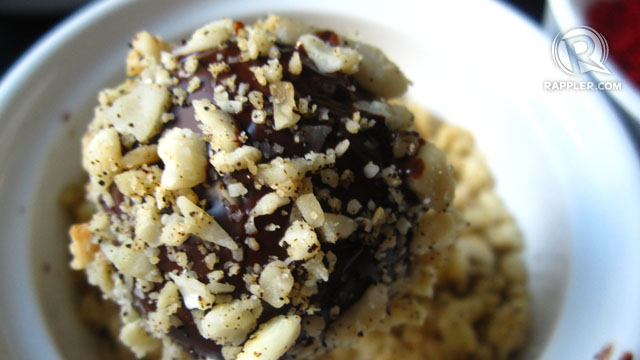
7. Insert dipped and sprinkled cake pops into Styrofoam and let set.
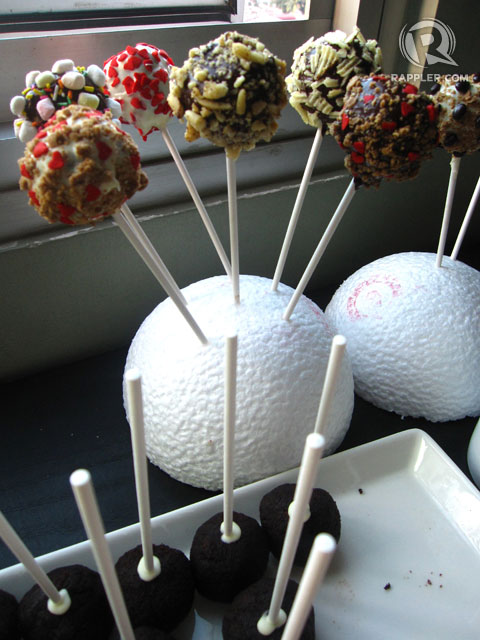
After having made a batch, I have a few recommendations:
- If you’re using white chocolate, make sure to use it last for when the cake balls have thawed. It seems to be much more sensitive to temperature change; so much so that when you dip into it with a very cold cake ball, it hardens almost instantly and the sprinkling ingredients won’t stick.
- However, if this does happen, you can still use the bigger ingredients like marshmallows and sunflower seeds by using more melted white chocolate as glue. Tedious but definitely doable.
- If you notice that the chocolate is taking too long to set, just bring the cake balls back to the freezer for a few minutes
- When done setting, you can harden some more in the refrigerator

To give as gift, wrap in pretty paper and tie with a ribbon.

Not only is this a delicious and beautiful Valentine’s Day gift, it’s also such a joy to make! The flavor combinations are endless starting from cake to chocolate to sprinkling ingredients.
Feel free to go a little wild and have a blast! And don’t forget that Valentine’s Day isn’t strictly for romantic love. You can make these for family and friends, too.
I hope you all enjoy making this as much as I did. Happy Valentine’s Day to you and yours. <3 – Rappler.com
 Sam Oh is a professional TV and events host, radio jock, and foodie wannabe. Catch her on radio at 99.5 PlayFM, Monday to Friday, 6am-10am in “The Playground” with Tim Yap and Nikko. She is also a food blogger at Sam Likes It Hot. If you have questions or recipe requests, email desk@rappler.com with subject heading SAM LIKES IT HOT.
Add a comment
How does this make you feel?
There are no comments yet. Add your comment to start the conversation.