SUMMARY
This is AI generated summarization, which may have errors. For context, always refer to the full article.

MANILA, Philippines – Food photos, or “foodstagrams” as some call it, have become a universal habit for many social media users today. You’d be hard-pressed to find anyone who digs in right away without snapping a photo or two. (READ: Dining rules in the age of Instagram)
Recently, Australian commercial food photographer Trudy Schuringa was in town and showed us a few tips on how to shoot better food photos with little else but your smartphone.
Here are a few tips on making a few edits, adjustments to the setup, and lighting – because every detail matters when taking shots of food from Trudy, after a food photography session in Lombardi’s at the Shangri-La mall.
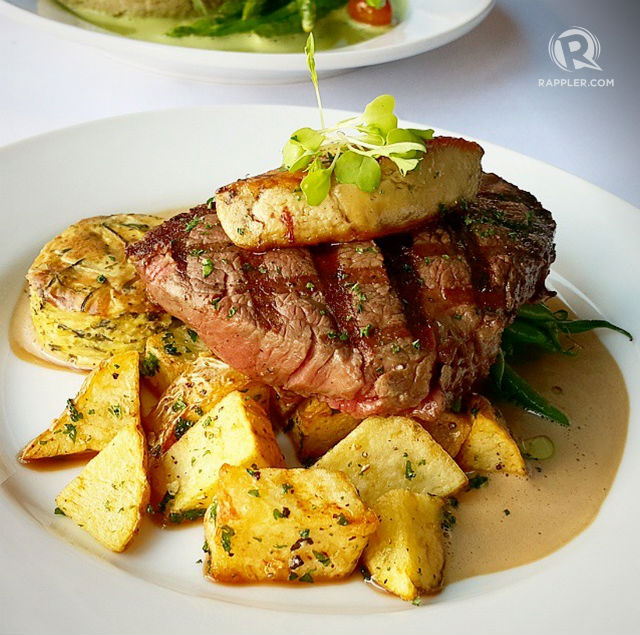
1. Many good food photo are composed by focusing mainly on the food, with a blurred background.
Trudy said: “The best-looking food shots are taken when you have a shallow depth of field, and the background is partly blurred out. So the whole focus is on the food, and everything else around it is out of focus.”
Here’s a food shot taken by Trudy herself. While the shots were taken via camera, it’s fairly simple to accomplish the blurred background and focus shot on the smartphone.
Before taking a photo in the Camera App, tap twice to focus on the subject, and the background automatically blurs. There you have it.
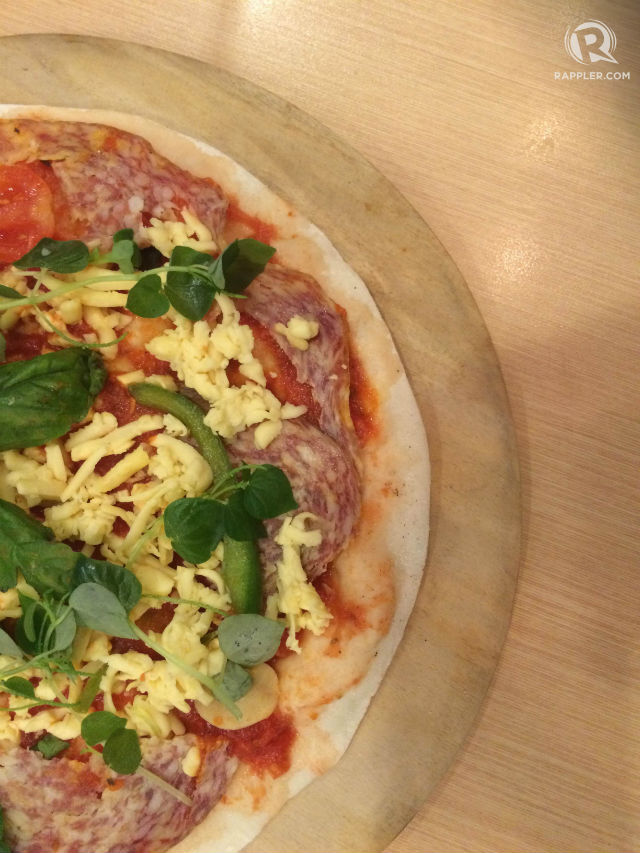
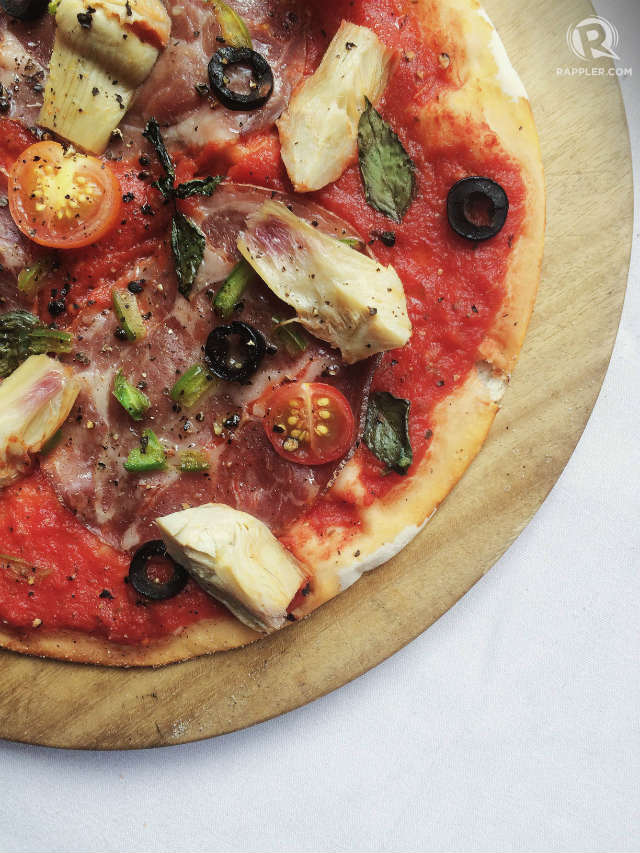
2. Always use natural light
Trudy highlighted this as one of the most important things to consider, and also suggested the subject be shot against a white background. She explained that this often enhances the food’s own colors.
Restaurants usually have fluorescent lights, which make the background of food shots orange or yellow, making it slightly difficult to edit.
This pizza photo was taken inside the restaurant:
This photo was taken near the glass window – plenty of sunlight:
3. Shoot from a 45-degree angle (most ideal)
Trudy demonstrated to the class to shoot from a 45-degree angle, which she said was the most ideal. As pointed out earlier, shooting from above may be difficult in some restaurants because of the harsh lighting, and shooting at a straight angle will not capture all the elements of the food.
While she demonstrated using a camera, the convenience behind shooting at this angle will not require standing up when taking the photo. At the same time, the elevated angle gives the shot more depth.
4. But if the 45-degree angle does not work, experiment with different angles
In some cases, the 45-degree angle does not work, so it’s best to experiment shooting from different sides to get a really good shot. Trudy said that the ideal shot is 3/4 – where 75% the plate is seen. She also advised that at times, it’s not ideal to shoot the whole plate, because the focus might be on the plate instead of the food.
Below, I shot two photos of a pasta dish. According to Trudy, the first up-close one is not such a good photo. The focus may be sharp, and you can see the texture of the noodles, but the whole dish is not seen.
She also added that the background should be clean, free of any unnecessary props like that cart of condiments behind.
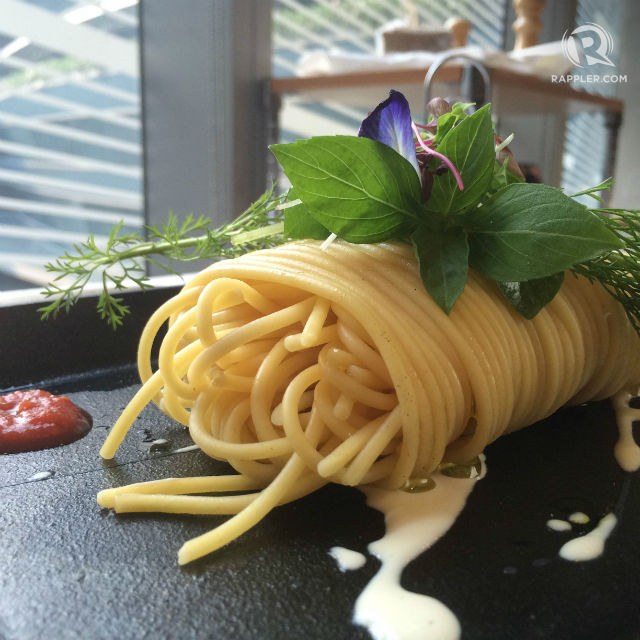
The second one, taken from above, was a better way of showing off the dish, especially since it had a garnish in the middle.
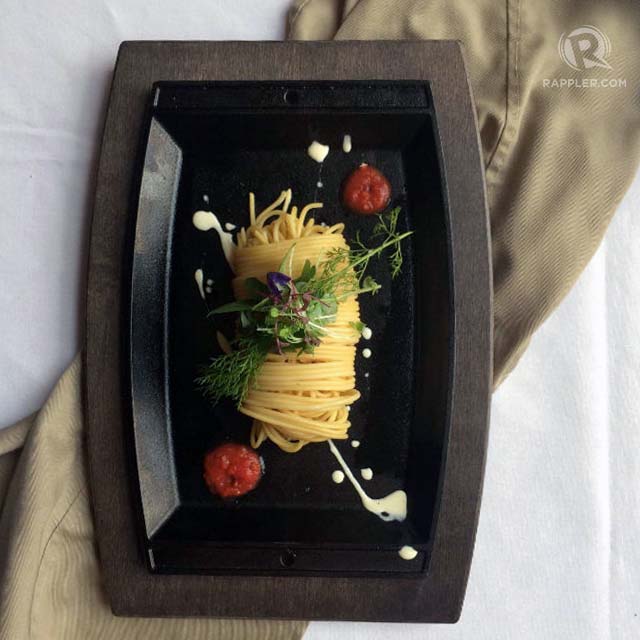
Tip: Have fun with props! Like the photo shown above, one can add pops of colors using simple materials that are available to you. But in restaurants, cutlery and other restaurant elements like candles can enhance and provide the proper atmosphere for the shot.
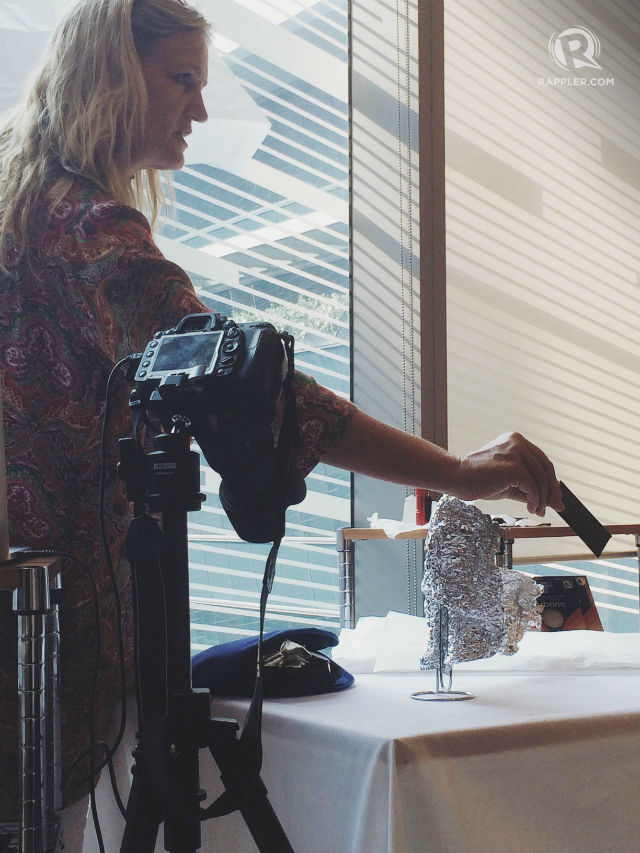
5. Bring ‘light enhancers’ with you
You won’t need professional lighting equipment. Trudy suggested a pocket flashlight and aluminum foil (if it comes with your dish, for example) if lighting is terrible and dark.
She demonstrated in the photo below how one can hold a flashlight from certain angles to better light the subject. A piece of aluminum foil is also visible, which is used to reflect light.
Pro tip from Trudy: Never use flash when taking photos of food. “It’ll make your food look pasty, too bright, and just plain terrible,” she said. – Tiffany Go/Rappler.com
Add a comment
How does this make you feel?
There are no comments yet. Add your comment to start the conversation.